Friday, March 29, 2013

Square Diaper Cake


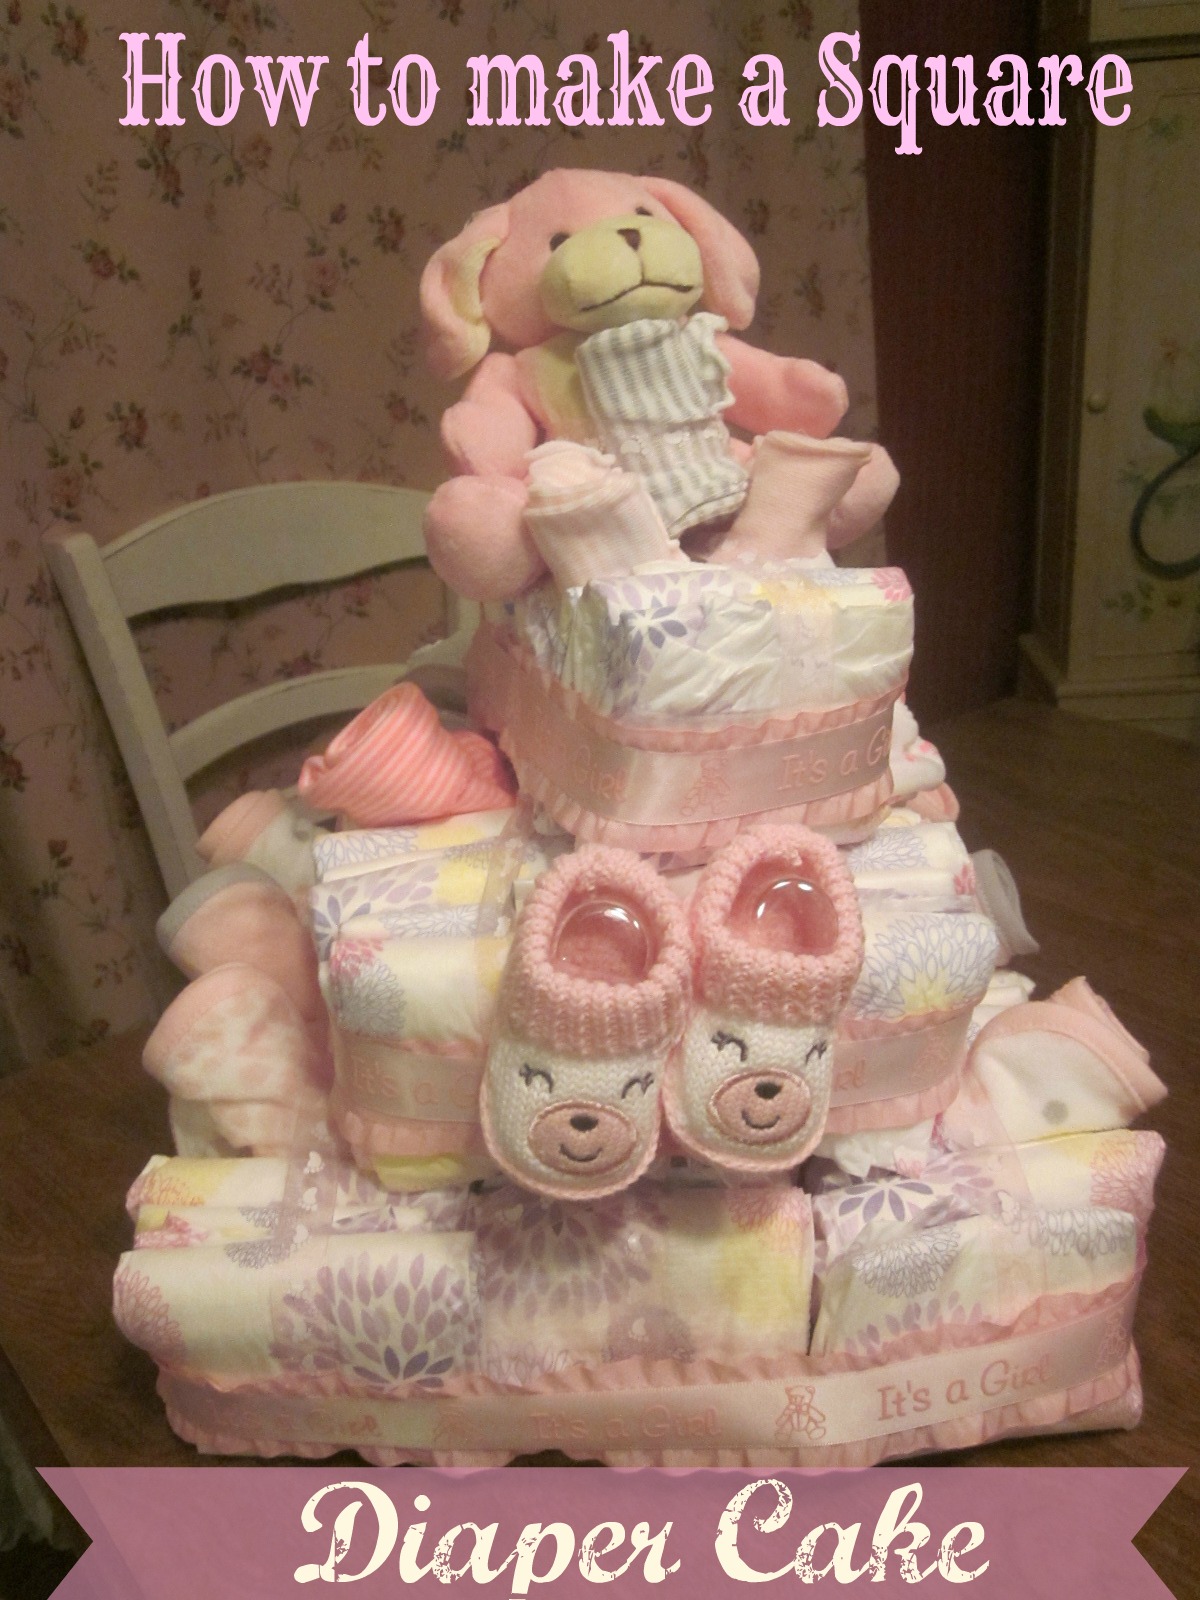
Diaper cakes are a fun decoration for baby showers and they are easy to make- especially this one.
Typical round diaper cakes have each diaper wrapped and then rubber banded- a pain for both the one creating and receiving the cake. A square diaper cake has the diapers folded and then you stack them and tie them together.


First you start with a diaper, the newborn ones are too little, size 1 or 2 works well. The diapers I used were Honest Company Diapers.
 
Check out my review of Honest Company Diapers here.
 
Then fold the diaper in half.
Take the next diaper and fold it in half and stack them together so that the folds alternate.
Keep folding and alternating to make a stack of 15 diapers. Tie a ribbon, or twine or use a large rubber band to keep them together.
Repeat this stack of 15 twice. This means you'll have 3 stacks of 15 diapers-
this will be the bottom layer of the cake. Then take some ribbon and connect
all three stacks together to form the bottom layer.
For the second layer make two stacks of 12 diapers.
Stack it on top of the bottom layer and tie them together in between the two layers. 
For the top layer make one stack of 10 diapers and place on top as the top layer
and secure it to the one below it as you did with the middle layer.
Now for the fun part- decorate it with fun baby items like lotions, socks,
brushes, hair clips, burp cloths, wash cloths, shoes, etc.

How to Clean Your Pillows

Did you know that your pillows can hide dust mites???!!! YUCK!!! So it is very important to clean or replace your pillow periodically. Now most soft fiber (synthetic or down) filled pillows can be washed in the washing machine- check the washing instructions on the pillow tag. The squishy contoured foam ones can't be washed, but their covers usually can.

To wash your pillow, put in the washing machine on a gentle cycle with a mild detergent on hot water to kill germs and mites. It is a good idea to do two pillows at a time to keep the washing machine balanced. I always run it through another drain/spin cycle to make sure all the water is wrung out from the pillows. Then put in the dryer, be sure to follow drying instructions for your pillow and be sure it is completely dry before using it again as if it is damp it can mold.

Pillows should be washed at least twice a year. If you or a family member had a dust allergy, it is a good idea to do it more frequently like four times a year. Purchasing a dust mite cover is a good idea as well for allergies.  And you shouldn't go to sleep with wet hair as this can cause your pillow to get moldy.

Sunday, March 24, 2013

How to Dust

The correct way to dust is from the top down, this way you don't get dust on areas you just dusted. And then vacuum the room after dusting.

1. Get out your Swiffer (or other duster) and start with the ceiling- ceiling fans and light fixtures.
2. Then do the crown moldings.
3. Dust walls from top down.
4. Dust lamps and decorative items.
5. Dust the tops, sides, fronts and also behind furniture.

6. Then dust the baseboards.
7. Follow up by vacuuming and you're all done.

TIPS: I use the Swiffer for ceiling, walls, reaching behind furniture and baseboards. To dust decorative items and furniture I use a damp cloth to collect the dust.

Saturday, March 23, 2013

Spring Clean: The Bedrooms

OK so we have cleaned the bedroom closets and have washed the curtains. Now it is time to deep clean the  bedroom.
Start from the top and work your way down:

  • dust ceiling fans and  fixtures.
  • dust crown moldings.
  • dust curtain hardware.
  • dust walls.
  • dust furniture.
  • dust all decorative items and picture frames.
  • dust lamps.
  • wash all bed linens.
  • wash pillows.
  • move all furniture (that you can) and dust and vacuum  behind.
  • vacuum room.
  • go through all drawers and organize items- get rid of items you no longer need or want. 
  • hang cleaned curtains.
  • enjoy!

Here's the correct way to dust

Wednesday, March 13, 2013

Spring Cleaning- Washing the Curtains

Before I deep clean a room I like to take the time to wash the curtains before I  start to dust.

For instance I pick a day to I know I can get the cleaning of all the bedrooms out of the way. Before I start to clean I take down all the curtains in the bedrooms and bring them to the laundry room. Curtains can really collect a lot of dust, you should really wash them at least twice a year, if not more. If you or a family member has a dust allergy you should wash them more frequently.

I short them into two piles each for their own load- one for sheers and the other for drapes. My curtains happen to be in the same color family somewhat- sheers are cream or white and drapes are light blues, greens and yellows so I can get away doing two loads. You may need to separate yours more by dark and light colored drapes if needed.

I toss mine in the wash on COLD on the HANDWASH or DELICATE cycle. Choose the gentlest cycle your machine has. If they say dry clean only, then follow the directions, unless you are willing to gamble and see how they turn out. I only buy draperies that say I can machine wash (personal preference, as I HATE dry cleaning).

When they are done in the wash I move them to the dryer and put on AIR DRY/FLUFF, NO HEAT, whatever is the gentlest cycle you have. If they are not drying I sometimes put them on LOW HEAT and do like 5 min intervals and keep checking them until they are dry.

If you don't like ironing, like me, then you need to take them out IMMEDIATELY when dry and hang them right back up. They may be a little wrinkled but they will fall out in a day or so. If a few wrinkles for a few days doesn't bother you, go this route. Otherwise iron before putting back up.

Just be sure to CLEAN THE ROOM BEFORE putting them back up as you don't want dust all over your freshly cleaned curtains!

Wednesday, March 6, 2013

Spring Cleaning: The Closets

Today it is onto the Bedroom Closets. I always start the Spring Clean of bedrooms with the closets because it can be dusty in there so I don't want to clean the room and bring dusty stuff out and make it dirty again.


Here's a before shot of one of our closets-
 
Not too too bad. But definitely in need of a cleaning and makeover.
The shelves were plastic and rickety and not working for us.
We needed more storage space.
 
 
Here's the after version-
 
We didn't need that much space to hang clothes as this room has several dressers, what we needed was toy storage so I purchased this cubby system and some cloth bins. It fits perfectly, but my hubby did have to build it in the closet as it would not have fit it once built- we measured first!
 
To Clean the Closets:
1. First take everything out.
2. Dust the ceiling and wall- yes I said dust the closet. Start from the ceiling, do the walls
and any shelves. This is good to do because sometimes you may find a spider or two in there as a nice, warm cozy closet is a good place to hide and not get bothered.
3. You may need to clean the walls if your closet has a musty smell- mix a little baking soda and warm water and dampen a sponge or rag and wipe down the walls.
4. Vacuum the floor and, if needed, clean it as well.
5. Now that the closet is clean, it is time to address the STUFF that goes back in.
6. Go through the clothing and decide what you wear and don't wear, for a kid's closet you need to address what doesn't fit any more and what they are growing into.
7. Decide what type or organizing is needed; more room to hang stuff? more storage like a dressers or drawers? need more shelving?
8. If its a kids closet you may want to have a bin for clothes as they outgrow them. When you find an item that doesn't fit anymore stick it in there and when it gets full it is time to store them for the younger ones or donate them.
 
 
TIP- if your closet still has that musty closet smell try sprinkling some baking soda
in your shoes- as shoes are usually the culprit.