Saturday, June 15, 2013

How to Clean Your Dyson

Hi All! Just Cleaning out my laundry room and got my vacuum particularly dirty (post on spring cleaning laundry room coming soon) and had to clean it before I would even think of using in on the rest of my house, so I thought I would share how I clean my Dyson.

First of all, let me say, I LOVE, LOVE, LOVE my new Dyson. I had one previously but after having allergies and asthma diagnosis in the house I wanted to get a HEPA filter vacuum. The old Dysons are not HEPA (and that is the ONLY reason I decided to get a new one- old was was still working great after 5+ years), but they have new ones that are. Here is my Dyson.

As you can see from the picture above...pretty yucky! First I emptied the canister (outside) then I took  the filters out (there are two)and rinsed them in the sink.
Next I took all the attachments and canister and rinsed them out in the sink with warm water. Then I sprayed those with my favorite new cleaning product, by trusty Organic Basic H and rinsed them again.
Yuck!! See all that gunk!
 
 
Then I cleaned the vacuum itself by spraying with my Basic H and wiping down with a cloth.


Just in case you aren't grossed out enough.. here's more yucky pics.
 
I turned the vacuum upside down and attacked all the hair that was caught up in the brushes.


I let all the parts dry for like 48 hours and then I put in back together. All ready to do some more cleaning!!!!


Monday, June 10, 2013

Spring Clean: The Dining Room

Moving onto the Dining Room. OK I will be honest- this is my least favorite room to clean! Mainly because it it rarely used and therefore when I do clean it- it takes a long time!!!! So I try to do this cleaning twice a year and I will time it to go along with a major holiday like Thanksgiving and Easter. Because if you are hosting that holiday, let's face it...it needs to be done! So as you can tell, since I am cleaning in June, that I did not host Easter this year! LOL!
-First start by dusting from the top to bottom; ceiling, light fixtures, top of cabinets and/or hutches, walls and pictures.
-Empty out hutches and/or cabinets- take everything out and put on the table.
-What can go in the dishwasher gets put in and run through- this may take several loads as I don't overload it when I have expensive china in it. Speaking of china that is my pattern Charleston by Lenox (it's retired)
-Then hand wash the rest of the items (like glass and crystal).
-While this stuff is being washed/dried clean out cabinets/hutches with a damp rag.
-Reorganize what you have and decide if you need ALL those bowls, servers, etc.
-Make sure to clean your silverware.
-Dry everything well before putting it back in.
-Now that you can see your table top again clean it and throw any tablecloths and cloth napkins in the wash (or hand wash any delicate lace you have).
-If you are not hosting a holiday all linens can be stored, if you are hosting get out your iron and board and gets those linens ironed.
-Give the chairs a good dusting along with any other knick knacks on display.
-Give a good vacuum.

Now enjoy your clean dining room for like 5 minutes before you have to start cooking!

Monday, May 20, 2013

Vinegar as a Home Remedy


Did you know Vinegar can be used to treat some simple common ailments?

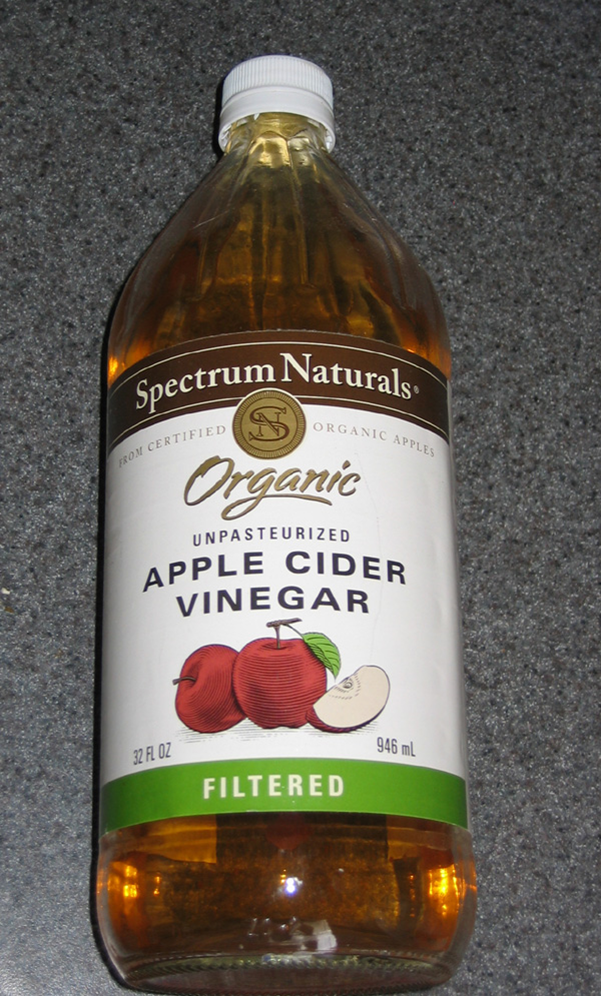
1. Athlete's Foot-  Got a case of itchy athlete's foot? Try some Organic Apple Cider Vinegar.
Add 5 cups vinegar and 5 cups water to a plastic tub and soak your feet from 5-10 minutes for 10 days. Be sure to soak both feet as athlete's foot is very contagious to make sure it doesn't spread. Dry your feet well afterwards. (Seek medical attention if you have tried this and it is not working) You may want to do this every so often even if not affected at the time as a preventative method if you are someone who gets this chronically.

2. Toe Nail Fungus- Have embarrassing toe nail fungus? Try some Organic Apple Cider Vinegar.
Add 5 cups vinegar and 5 cups water to a plastic tub and soak your feet from 20 minutes for several times a week. Be sure to soak both feet as fungus is very contagious to make sure it doesn't spread, dry feet well. Or if you don't have time you can put some undiluted vinegar into a spray bottle and spray toes with it twice a day. (You could do a combination of the two ways) Be sure to continue until the nail bed had grown out and there are no more signs of fungus.(Seek medical attention if you have tried this and it is not working)  You may want to do this every so often even if not affected at the time as a preventative method if you are someone who gets this chronically.

3. Dandruff- Got a case of the itchy dandruff flakes? Try some Organic Apple Cider Vinegar.
Dandruff comes from having to much yeast on your scalp, apple cider vinegar changes the pH of your skin. Mix 50/50 solution with water and put in a spray bottle. Spritz your scalp (be careful not to get ears and eyes) and let sit for 15 minutes to an hour, then rinse and dry.

4. Yeast Infection- As mentioned above vinegar changes the pH of your skin so if you are suffering from a yeast infection this is a good way to calm things down down there until you can get to the doctor for more assistance. (Always have any female issues checked as it may not be a yeast infection at all- it could be bacterial)  Try a vinegar bath- pour 1 cup vinegar into a tub and soak for 20-30 minutes, dry well. Don't have 20-30 minutes,  try a wash cloth dampened with a little vinegar and warm water- pat the itchy area with the cloth being sure to stay externally.

NOTE- if you aren't having any luck with these please seek medical assistance!!!!

Thursday, May 16, 2013

Nontoxic Toaster Oven

What? Toasters are toxic? What am I talking about???!!!

Well this story begins when I wanted a new toaster oven for my birthday- simple enough request, right? Who would have thought it would become quite a production?! I did some shopping and decided on a KitchenAid Toaster. It was pretty and new and shiny and when I turned it on for the first time it STUNK up the house SO BAD that my husband and I had headaches and I had to open all the windows and turn on the ceiling fans for hours!

A little research online revealed that other people were complaining of this from this toaster too. So I researched other brands and found the same complaint. WHY are these ovens stinking so bad? Well more research gave me the answer. Nowadays toaster ovens come with a nonstick interior and are covered in protective oils for storage which leads to a noxious smell when used and from the complaints I have read lingers every time they use it for quite some time.

Well what to do? Keep the smelly toaster? With all the hype about nonstick cookware being not good for you I kept thinking about any damage I was doing to my family by turning on this toaster oven. Nonstick cookware fumes are toxic to birds- if you have a bird as a house pet they tell you not to use them. Well if its not good for birds, how good can it be for people? I got rid of my nonstick cookware a few years ago and opted for more healthy stainless steal pots and pans, why then would I want a nonstick toaster oven? I didn't...I don't! So back to the store it went and I was back on the search for a new, new toaster- one that would not make my family sick!

Which one did I FINALLY decide on? Well as far I could find WARING is the only company that has toaster ovens that DO NOT HAVE nonstick coatings inside. Once I read and did extensive research (much more than I feel should have been necessary for a toaster oven) I decided to purchase it. Once it came, we took it out and plugged it in and did a test run as the manual suggested and guess what? NO SMELL!!! Yes! So short version- if you are looking for a nontoxic, non-smelly toaster oven check out the Waring Pro® WTO450.

Tuesday, May 14, 2013

Spring Cleaning: the Living Room and Den


OK so now we are onto the den and or living room.

As always start from the top and work your way down.

1. Remove all curtains and wash them.
2. Start dusting from the top down.
3. Move all furniture and dust behind it. (you'll be amazed at how much dust accumulates back there.
4. Now is a good time to empty out cabinets and drawers, wipe them down with a rag and go through what you want to keep/toss.
5. I toss all throw blankets in the wash to refresh them.
6. Sprinkle the couches and carpets with baking soda, let sit for 15 minutes and then vacuum it up to freshen them and remove odors.
7. Wash the windows.
8. Then rehang your curtains.
9. Enjoy your clean room.

Simple Sugars


I recently ordered and received this wonderful product called Simple Sugars. Simple Sugars are all natural body scrubs made for people with sensitive skin that smell fantastic and make your skin feel great! It works by exfoliating and removing the dead skin while moisturizing the new skin. Use it at often as you like, it is safe enough for everyday use. They use only the highest quality ingredients, some of which are organic, with NO artificial preservatives. They offer facial scrubs, body scrubs and foot scrubs. I was sooo impressed with the results- it even cleared up my eczema on my hands!!! I ordered the strawberry and vanilla flavors, but there are plenty others to choose from. So if you are in the market for a new, all natural skin care product, check them out! (I have NOT been paid for this- just really like the product and thought I'd share).  :)