I decided upon this system as it offered a way to keep his lunches contained and cool and it also had many green features. The company boasts:
Monday, April 29, 2013
Laptop Lunches By BENTO-WARE
Knowing that in the fall my son is going to need a lunch system I decided to start researching them now and was pleased to find and purchase this Laptop Lunch System from Bento-ware.
I decided upon this system as it offered a way to keep his lunches contained and cool and it also had many green features. The company boasts:
Safe! NO lead, BPA, phthalates or PVC
Cost-effective - pays for itself in just 3 weeks
Reusable - lasts for years
Recycled & Recyclable
Easy to Clean
Waste-free
Food containers made in the USA 
Also the containers and lids are all dishwasher safe and the containers (not lids) are also microwave safe. I was very happy with the quality of the product and many of the reviews said they have had these for several years and are still going. They are a bit more expensive that regular lunch systems, but if they last several years, I feel they are worth it, plus the knowledge that they are as safe as I can get also gives me peace of mind. So check these out of you are in the market for new lunch boxes!
I decided upon this system as it offered a way to keep his lunches contained and cool and it also had many green features. The company boasts:
How to get the Musty Smell Out of Your Towels
Well if you have been following along it will come as no surprise that my secret weapon will once again be Vinegar!
I recently went in to my dryer to get a load of laundry out and it smelt like the laundry had been in there for days and I know that it hadn't. So I rewashed the load, sprayed the inside of my dryer with vinegar and wiped and then ran a towel dampened with vinegar through a dry cycle. When it no longer smelt and the laundry was washed I redried them and they smelt fine. Now several days went by and I opened the dryer, this time to a load of towels and I smelt the musty smell again. This time the answer was staring me in the face- the towels!!! So I put them in the wash, this time after adding the laundry detergent I added roughly 1 cup White Vinegar (I eye-balled it) to the load. This time they came out with no smell and when I dried them the dryer didn't smell- YEAH! So the moral of the story- always wash towels in HOT water and add 1 cup vinegar to keep them smelling clean!
Happy Laundering! :)
I recently went in to my dryer to get a load of laundry out and it smelt like the laundry had been in there for days and I know that it hadn't. So I rewashed the load, sprayed the inside of my dryer with vinegar and wiped and then ran a towel dampened with vinegar through a dry cycle. When it no longer smelt and the laundry was washed I redried them and they smelt fine. Now several days went by and I opened the dryer, this time to a load of towels and I smelt the musty smell again. This time the answer was staring me in the face- the towels!!! So I put them in the wash, this time after adding the laundry detergent I added roughly 1 cup White Vinegar (I eye-balled it) to the load. This time they came out with no smell and when I dried them the dryer didn't smell- YEAH! So the moral of the story- always wash towels in HOT water and add 1 cup vinegar to keep them smelling clean!
Happy Laundering! :)
Wednesday, April 10, 2013
How to Clean Windows
For the purpose of this post we are strictly speaking about cleaning your windows from the inside.
First grab your trusty spray bottle of... you guessed it.. VINEGAR!
Spray the entire inside of the window with vinegar and wipes with a paper towel. I bring a small garbage bag with me and toss dirty towels in there so I don't get things messy as I go. Use a Q-tip for any tiny, hard to reach spots.
If your window has the capability to open in for cleaning then follow the same directions as above and clean the outside of the windows while you are inside. If not then you'll clean the outside when you do outdoor spring cleaning.
Spray the window sills last and wipe clean.
Once a month, especially in Spring and Fall when insects seem to want to invade, you should spray all around the window openings with vinegar on all your windows and doors and then wipe dry. The Vinegar smell deters them.
Friday, March 29, 2013
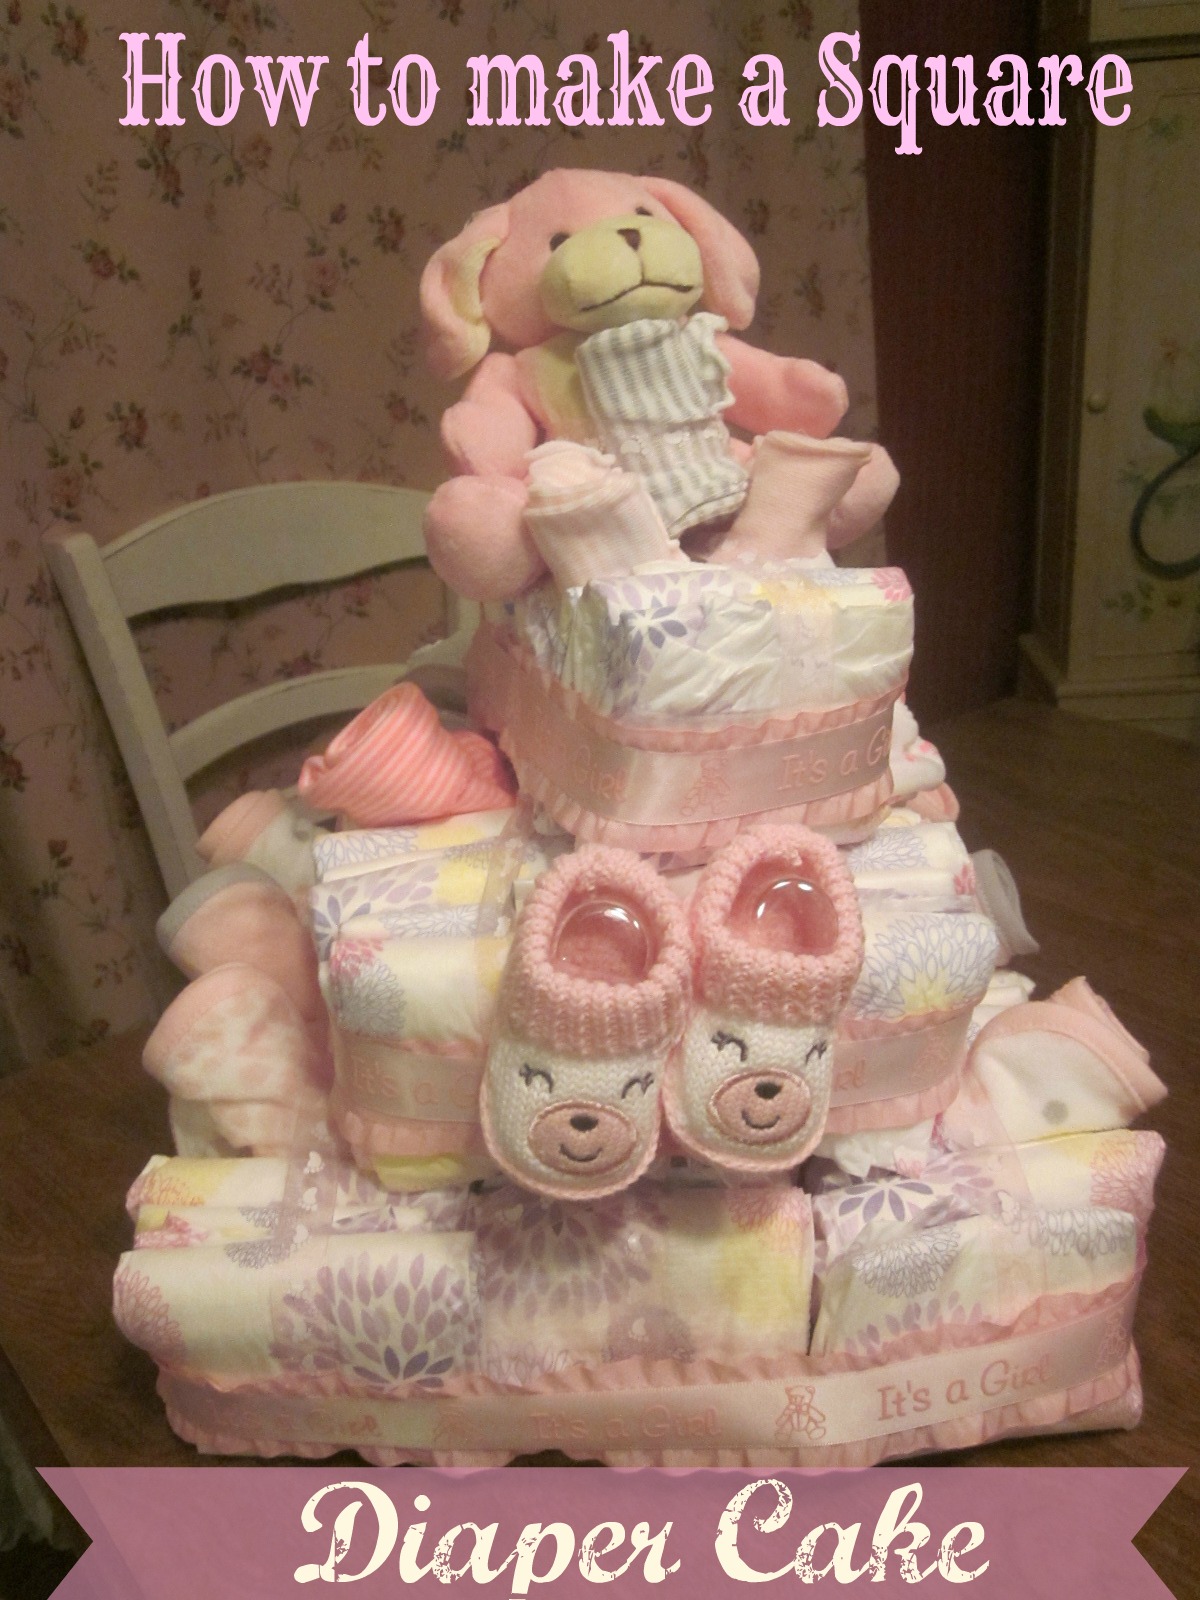
Square Diaper Cake
Diaper cakes are a fun decoration for baby showers and they are easy to make- especially this one.
Typical round diaper cakes have each diaper wrapped and then rubber banded- a pain for both the one creating and receiving the cake. A square diaper cake has the diapers folded and then you stack them and tie them together.
First you start with a diaper, the newborn ones are too little, size 1 or 2 works well. The diapers I used were Honest Company Diapers.
Check out my review of Honest Company Diapers here.
Then fold the diaper in half.
Take the next diaper and fold it in half and stack them together so that the folds alternate.
Keep folding and alternating to make a stack of 15 diapers. Tie a ribbon, or twine or use a large rubber band to keep them together.
Repeat this stack of 15 twice. This means you'll have 3 stacks of 15 diapers-
this will be the bottom layer of the cake. Then take some ribbon and connect
all three stacks together to form the bottom layer.
For the second layer make two stacks of 12 diapers.
Stack it on top of the bottom layer and tie them together in between the two layers.
For the top layer make one stack of 10 diapers and place on top as the top layer
and secure it to the one below it as you did with the middle layer.
Now for the fun part- decorate it with fun baby items like lotions, socks,
brushes, hair clips, burp cloths, wash cloths, shoes, etc.
How to Clean Your Pillows
Did you know that your pillows can hide dust mites???!!! YUCK!!! So it is very important to clean or replace your pillow periodically. Now most soft fiber (synthetic or down) filled pillows can be washed in the washing machine- check the washing instructions on the pillow tag. The squishy contoured foam ones can't be washed, but their covers usually can.
To wash your pillow, put in the washing machine on a gentle cycle with a mild detergent on hot water to kill germs and mites. It is a good idea to do two pillows at a time to keep the washing machine balanced. I always run it through another drain/spin cycle to make sure all the water is wrung out from the pillows. Then put in the dryer, be sure to follow drying instructions for your pillow and be sure it is completely dry before using it again as if it is damp it can mold.
Pillows should be washed at least twice a year. If you or a family member had a dust allergy, it is a good idea to do it more frequently like four times a year. Purchasing a dust mite cover is a good idea as well for allergies. And you shouldn't go to sleep with wet hair as this can cause your pillow to get moldy.
To wash your pillow, put in the washing machine on a gentle cycle with a mild detergent on hot water to kill germs and mites. It is a good idea to do two pillows at a time to keep the washing machine balanced. I always run it through another drain/spin cycle to make sure all the water is wrung out from the pillows. Then put in the dryer, be sure to follow drying instructions for your pillow and be sure it is completely dry before using it again as if it is damp it can mold.
Pillows should be washed at least twice a year. If you or a family member had a dust allergy, it is a good idea to do it more frequently like four times a year. Purchasing a dust mite cover is a good idea as well for allergies. And you shouldn't go to sleep with wet hair as this can cause your pillow to get moldy.
Sunday, March 24, 2013
How to Dust
The correct way to dust is from the top down, this way you don't get dust on areas you just dusted. And then vacuum the room after dusting.
1. Get out your Swiffer (or other duster) and start with the ceiling- ceiling fans and light fixtures.
2. Then do the crown moldings.
3. Dust walls from top down.
4. Dust lamps and decorative items.
5. Dust the tops, sides, fronts and also behind furniture.
6. Then dust the baseboards.
7. Follow up by vacuuming and you're all done.
TIPS: I use the Swiffer for ceiling, walls, reaching behind furniture and baseboards. To dust decorative items and furniture I use a damp cloth to collect the dust.
1. Get out your Swiffer (or other duster) and start with the ceiling- ceiling fans and light fixtures.
2. Then do the crown moldings.
3. Dust walls from top down.
4. Dust lamps and decorative items.
5. Dust the tops, sides, fronts and also behind furniture.
6. Then dust the baseboards.
7. Follow up by vacuuming and you're all done.
TIPS: I use the Swiffer for ceiling, walls, reaching behind furniture and baseboards. To dust decorative items and furniture I use a damp cloth to collect the dust.
Saturday, March 23, 2013
Spring Clean: The Bedrooms
OK so we have cleaned the bedroom closets and have washed the curtains. Now it is time to deep clean the bedroom.
Start from the top and work your way down:
Here's the correct way to dust
Start from the top and work your way down:
- dust ceiling fans and fixtures.
- dust crown moldings.
- dust curtain hardware.
- dust walls.
- dust furniture.
- dust all decorative items and picture frames.
- dust lamps.
- wash all bed linens.
- wash pillows.
- move all furniture (that you can) and dust and vacuum behind.
- vacuum room.
- go through all drawers and organize items- get rid of items you no longer need or want.
- hang cleaned curtains.
- enjoy!
Here's the correct way to dust
Subscribe to:
Posts (Atom)